A to Z of using a milking machine
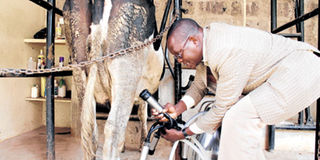
Albert Miare uses a milking machine on his farm in Kasarani, Nairobi. FILE PHOTO | NATION MEDIA GROUP

What you need to know:
- The tension lost with time is sufficient enough to cause incomplete milking, expose the cow to increased teat end damage and spread bacteria.
- Since liners are the parts of the machine that get into direct contact with the cow during flexing and squeezing of the teat, they lose tension, absorb milk fat and hold bacteria with time.
- With machines, there is little milk spillage, no environmental contamination and guaranteed cleanliness provided the equipment is thoroughly cleaned.
More farms are adopting milking machines due to for health and hygiene reasons.
Good milking techniques require that the cow remains comfortable and relaxed. This is a plus that farms who use milking machines have over hand-milking.
The effectiveness of a milking machine lies in its efficient functioning, cleaning and correct application and removal.


CHECKING COMPONENTS
Proper management of milking machines requires that all the parts are understood well. Routine maintenance or cleaning of mechanical parts and rubber components form the basis of their being effective.
This calls for constant examination of the machine. Daily checks require that the air vents are inspected for blockages. Blocked vents eventually lead to slow or incomplete milking and makes the removal of clusters difficult. Carefully remove dirt but avoid using equipment that may enlarge teat holes.
The milk vacuum must be checked and listened to ensure all pulsators have regular and intermittent sounds. The milk entering the enclosed receiving churn should flow evenly.
The cow’s behaviour must be checked. Does she feel nervous or comfortable when teat cups are applied or removed? Try to feel for any swellings at the top, middle or end of the teats.
Search for cracking or sores made on the teat canals by the machine. Also check for completeness of the milking. Weekly checks mainly lie on examining the filters, pulsator airlines and liners.
Check for mouthpiece cracks, splits or distortion.
Additional regular checks require monitoring the teat cup slips from teats regardless of the udder conformation. More teat cup slips means incorrect mounting. Note the average time of milking; a milking machines adjusted correctly takes seven minutes, but this may vary depending on the amount of milk a cow produces.
A routine maintenance demands that teat cup liners be changed after every four to six months as recommended by manufactures. Since liners are the parts of the machine that get into direct contact with the cow during flexing and squeezing of the teat, they lose tension, absorb milk fat and hold bacteria with time.
The tension lost with time is sufficient enough to cause incomplete milking, expose the cow to increased teat end damage and spread bacteria.
EQUIPMENT CLEANING AND SANITISING
Cleaning ensures milk residue and dirt are removed from the equipment while sanitising removes bacteria from already cleaned surfaces. Both practices minimise bacterial contamination and spread in the machines. To clean, first detach the parts then remove all loose dirt and rinse the machine with warm water.
Follow by hot cleaning using a detergent to clear surface deposits, then rinse with cold water. Finally, apply a sanitiser, especially to surfaces that come into contact with the cow and allow to dry under shade with sufficient flow of air.
APPLICATION AND REMOVAL
First, clean and dry the teats of the cow before attaching any part of the machine. Dirty and wet teats increase the risk of mastitis infection and contaminate milk with bacteria. Then just before you mount the teat cups, check for mastitis.
Gently squeeze each teat for the first milk squirts and check against a strip cup for clots or abnormal milk colour. Ideally, teat disinfection before attaching the milking machine can be done to help reduce mastitis.
When the teats appear filled with milk, gently mount the teat cups. This appearance results from stimulation of milk let-down effect and is the best time to fix the machine. During milking, monitor for any air leakage through the teat cups.
Adjust the cups to hang over the claw correctly to arrest leakages. Less flow of milk into the collection churn is an indication of milk let-down coming to an end. At this time, cut the vacuum to the cluster to release the teat cup. Pulling off without cutting the vacuum is not advised as it encourages the damage of teats.
After completely detaching the machine from the animal, follow by hand-milking to ensure milking is completely done.
To conclude, be warned that cleaning these machines may not be easy and careless detaching of parts may cause damage. If not sure, always contact where you sourced the machine for help in maintenance and cleaning services.
With machines, there is little milk spillage, no environmental contamination and guaranteed cleanliness provided the equipment is thoroughly cleaned.
There is also less or no damage on teats. Sometimes use of hand milking can be painful depending on the milk man.
Long nails also cause cuts on teats. Milking machines make the cows feel more confident, calm and relaxed for free milk let-down.
Milking machines make dairy farming easy and enjoyable.